Luxury accommodation in the Aegean countryside

Author: Jason (Page 3 of 7)

Opening day coming soon

Right now I am supposed to be making either a garden trellis for the honeysuckle vines behind the pool, or a wooden worktop for room one’s kitchen area. Too busy to write much, but I thought I should post some photos to keep everyone up to date.

Our big news is that we have our first guests coming in early May so it’s really important that everything works and that the place is looking presentable. Room two (the one we show you all the photos of) is now 99% finished, while room one needs a bit of work but things are progressing fast.

Room in close-to-final form

Room two in close-to-final form.

Other view

Another view.

Mini-kitchen done

Room two kitchen area done.

Bathroom done

Bathroom now has a vanity mirror.

Towel hooks

More welding: towel hooks for the bathroom.

With actual guests coming, we need to make sure the place is accessible. On a rainy day you would struggle to get a typical rental car up the hill, so we knew that the time had come to concrete the driveway. The preparation work takes the longest: compacting gravel in the problematic low-lying sections, building borders and formwork to hold the concrete in, laying and wiring up lots of steel reinforcement, etc. Then two very tough days of actual concrete pouring and it was done. (I am currently trying to block out the memories.)

Sirem the day before the concrete went in

Sirem checking out the reinforcement the day before the first concrete went in.

Lots of work went into this shot

Lots of work went into this shot. (And yes, the hillside is a mess: one more thing on the to-do list.)

The really urgent priority is getting room one into shape, but we also have to do some landscaping work so the place doesn’t look so much like the building site it still is. That means more garden beds and lots of plants, but we also need a path to get to the rooms, the pool, and beyond. Concrete was a good solution for the steep driveway, but obviously we didn’t want to lay it everywhere. So the path is going to be built with paving stones.

Crushed gravel to support paving stones

Compacted river gravel to support the paving.

Paving stones

Paving stones going in, drainage canal taking shape.

Koray and Berrin

Koray and Berrin working on a garden wall. Those steel structures will become concrete posts to support the entrance gate, giving the accommodation area  a bit of privacy.

For two guest rooms and the cafe, we need a lot of furniture. Tables, beds, sofas, chairs, wardrobes, and all the rest. Given that we already have a lot of woodworking tools, and that the budget is running low, it was an easy decision to make most of the stuff ourselves. (The one exception: we’re buying chairs for the cafe. Chairs are fiddly and take too long.) There’s some work in it, but it’s great to be able to build pieces in the exact size and style you want.

Bed being made

One of the beds being made.

Table, sofa

Front to back: an angle grinder used as a brutally efficient sander, a very hardworking router, a table, and a sofa.

Finished bed

A finished bed with two little bedside tables: we definitely have a chunky country aesthetic going.

A new friend came to visit a few weeks back, and we used that as an excuse to do a practice run of the breakfasts we want to serve to our guests. Hopefully the photo below helps to convince someone out there to make a booking. Speaking of which: we’re going to start by listing the place on Airbnb, but we’re just holding off on one or two little details first, like our final inspection from the council. We’ll definitely make a post when that happens though.

Breakfast

Breakfast on the veranda.

Very soon we will have to get out of the way and move back down to the old farmhouse. We’re going to miss the new room, of course. But the weather is much warmer now and the leaves are back on the fig trees and the grape vines, so the old house is a much more cheerful prospect than it was in mid-winter.

Spring morning in the olive grove

Spring morning in the neighbours’ olive grove.

The dogs and cats are being their usual helpful, dirty, lazy, beautiful selves, and they’re clearly as happy as we are to see the return of warmer weather. Here are some dog photos to fulfill our prescribed animal content quota.

Tito yawning

Tito yawning.

Zeliş goofing around

Zeliş goofing around.

Thanks for reading. I hope that next time we post it will be to announce that bookings are properly open. Now I have to get back to it — bye!

So much to do

Winter has come. When we get a north wind in January, it gets colder here than you might imagine. (Certainly colder than I was imagining in 2014.) And again we had some snow this year.

Winter weather

A dusting of snow.

But this winter has been much easier than the last, as we have temporarily moved into room two. It’s been great. We’re pleased to report that straw bale walls insulate just as well as advertised. To give you an idea: in the evenings we use the reverse-cycle air conditioning to get the temperature up to about 21 degrees, then switch it off when we go to bed. Even on the coldest nights, the room is still at about 18 degrees in the morning.

I’m almost reluctant to share the next two shots, as the room doesn’t look as pretty as it did in the previous post. In fact it’s quite cluttered now, as we’ve crammed a lot of furniture in. There’s a bed, a kitchen table with chairs, two sofas, two computer tables, etc. We’re really happy that you can comfortably fit all that in, but of course we’re going to return it to the originally intended minimalist/rustic splendour before the paying guests arrive.

View from the door

Room 2 with all our domestic junk in it.

View from the bed

View when you wake up in the morning.

Also the floor is no longer bare concrete. We went with 30 x 30 cm tiles in a red clay colour with wide grout lines — blatantly stealing a look we’ve seen in old houses in Spain and Italy. Hopefully we’ll get away with it.

Panini with floor tiles

Panini welcoming us home: note the tiles!

The cats are very pleased with the new room, not least because of the aforementioned reverse-cycle air conditioning. Some of them spend the whole day lying on the bed or one of the sofas. I have tried to explain to them that this luxury is only temporary, and by April we will all be back down in the farmhouse, but I am not sure they are listening.

Çezmi

Cezmi takes a break from his building inspector role.

Coco

Coco pretends to be surprised by his own cuteness.

Life is harder for our loyal dogs, who spend their days warning us about approaching tractors or motorbikes on the road below.

Zeytin and Zeliş on duty.

Zeytin and Zeliş on duty.

The building is structurally complete now, so we’re moving on to interior fixtures and fittings. We’ve put the countertop and sink into room two’s little kitchen, but we still need to install a fridge and some cupboards under the counter, and to tile the backsplash.

Sink

Sink going in.

There will be furniture to make, too. After all the carpentry we’ve done on the building itself, making a bed or a coffee table feels very approachable. Here’s something we put together as a base for the bathroom sink.

Bathroom vanity

Chunky bathroom vanity unit.

Speaking of bathrooms, it has been life-changing to be back in a situation where you don’t have to go outside to get to the toilet. That’s not too bad in summer, but it gets old pretty quickly when the temperature is below zero. The en-suite bathroom in room two is not fancy, but it feels big and well-lit and most importantly it’s warm.

Bathroom working

Bathroom: still need to do a mirror, a shelf, some towel racks, etc.

Shower

Shower needs some finishing touches but is fully functional.

The ongoing saga of making all the windows and doors is reaching its conclusion. There is only one doorway left that still needs a frame, and about four or five more doors to do — in the cafe mostly — and then we’re finally done.

Kitchen window

Kitchen window showing the run straight through to the other side. Should lead to a nice breeze when cooking in summer.

Here’s one to file under “you can never have too much storage.” We completed the small attic above the kitchen the other day: the wooden floorboards also form the kitchen ceiling. Taller people may bump their heads on the occasional rafter, but there’s a huge amount of storage space up there. And two internal windows into the cafe area to let some natural light in.

Attic

New attic.

With the prospect of actually having two rentable rooms and a working cafe kitchen soon, it’s pushed us to get back to all the outside stuff: landscaping, drainage, paving the driveway, thinking about where to put cars, etc. We had a backhoe loader in last week and got the guy to smooth out some of our bigger piles of left-over dirt. And also to dig a long drainage trench all the way down from the top of the block to the driveway. Planning to hand-pour a lot of concrete and incorporate a few rocks to try to make the functional ditch into something a bit more attractive. Maybe even make a water feature out of it by pumping water back up to the top. Could be naff, could be wonderful. We will see.

House with drainage ditch

The so-nearly-completed building with a freshly dug drainage ditch in the foreground.

We’ve also started landscaping work at the back of the building, where there’s about four metres of space before the steep slope down to the road. The photo below is very messy, but there’s a few details that may be of interest. You can see our new fusebox on the left, and some short brick retaining walls that will define the garden (don’t worry, we’re going to render and limewash them). That’s our solar hot water system up on a steel tower which makes sure it gets lots of sun but is also hidden away on the north side of the structure. It’s a little ugly right now but when the leaves come back to the fig trees they’ll help hide it.

Landscaping at the back

Landscaping at the back

And finally: we had a couple of days of heavy rain a few weeks back, and all that water led to a little bit of shifting soil on the edge of the driveway. This made us nervous because the nightmare scenario has always been something like a cement truck going too close to the edge and ending up on its side in the farmhouse garden. So just to be safe, we ordered 180 tons of local stone dumped over the edge, to shore things up a bit like you would with a railway track. We lose a little bit of garden at the base, but it was a dark soggy area anyway. Personally I quite like the new look. (I also like ordering 180 tons of something — never gets old.)

Driveway reinforcement

Driveway reinforcement.


The furniture update

Quick disclaimer: we are not as close to being finished as some of these photos make it look. But we are getting closer!

Shortly we’ll have to decide which online booking sites we’re going to use. And we’ll need to make our listings look as good as possible. We could take bookings right now for, say, April 2017, but one problem is all our photos (for obvious reasons) make the place look like a building site. With this in mind, some friends had a great idea: why not borrow some furniture and take a few photos that show how things are going to look in a few months time when we’re actually ready for guests?


Sun lounges by the pool

Sun lounges by the pool

So we did. The furniture came from a few different places. We concentrated mostly on getting the pool area and the interior of room two to look good. Big thanks to Sirem’s mum Nadire, her sister Çisem, and her cousin Mevlüde for all the work on the beautiful quilt for the bed.

Interior with bed

Interior with bed. (That’s the bathroom door on the left, but sadly the bathroom was in no state to be photographed yet.)

Interior with door

Interior with column and front door.

Interior with sofa

Interior with sofa.

You’ve probably spotted the lack of floor tiles by now but hopefully we got away with it. The raw concrete slab doesn’t look great but I’d like to think it doesn’t take anything away from the rest of the decor.

Breakfast on the verandah perhaps?

Breakfast on the verandah perhaps?

It was good to put some real tables and chairs into the cafe: very reassuring to see that seating sixteen or twenty people in the dining area is completely realistic. Although we expect most people will want to sit outside on the terrace in the summer, it’s good to have seating space for cold or rainy days.

Cafe dining area

Cafe dining area

Originally it was just going to be a door and a sort-of serving hatch connecting the kitchen with the cafe, but that looked like a missed opportunity to have a proper bar. Years of visiting British pubs must have unconsciously left a mark as we seem to have reproduced one.

We have accidentally built a pub.

We have accidentally built a pub.

That thing just to the right of the bar, on the wall near the light switches, is our straw bale “truth window”. The idea is to leave a window opening in the interior plaster so people can see that there really are straw bales inside the wall. I didn’t quite get this convention at first, but now that we have seen the bales disappear from view, I understand why everyone does it.

Straw bale "truth window".

Straw bale “truth window”.

Garden doing OK.

Garden doing OK.

We were happy with the furnished photos but of course the furniture all had to be given back to the people we borrowed it from and building work had to go on. One big job recently has been putting insulation into the ceiling, between rafters, and then concealing it with interlocking wooden planks. I had been a bit worried that an all-timber ceiling might make the room look a bit like the inside of a sauna, but I’m happy with the result. See what you think.

Insulation and timber paneling going on the ceiling.

Looking straight up at insulation and timber paneling going between the rafters.

Night-time shot of the new ceiling.

A shot of the new ceiling.

No point having windows unless you eventually put some glass in them, and thus we contacted a local glass factory with good prices on double glazing. The only downside was they don’t deliver, so we had to lay all that glass in the back of the truck, wrapped in blankets and bubble wrap, and drive home very carefully. Nothing broke — yay!

Glass for windows and mirrors has arrived.

Glass for windows and mirrors has arrived.

Build your own windows for fun and profit.

Build your own windows for fun and profit.

Right, and in conclusion: I would write more but the truth is I need to sleep so I can get up in the morning and build more things. Here’s your animal photo as required by popular demand (something a bit different today).

Sorry, no cat or dog photos. Will you accept a tortoise?

Sorry, no cat or dog photos. Will you accept a tortoise?

And I am going to keep posting photos of that mountain until I feel I have got the definitive one. Quite happy with this shot though as it makes it look like we live a few kilometres from Mount Doom.

Sunset panorama from the highest point on our block.

Sunset panorama from the highest point on our block. (Zoomable full-size version here.)

Plastering and windows

We’ve been working hard lately, trying to get the first two rooms and the cafe habitable before the end of the year. Long days and six-day weeks are taking their toll. And now I sit here trying to think of good ways to describe what we’ve done but I’m conscious that I have to get up at 7am and do it all again, and anyway my brain is crammed only with window frame dimensions and sand vs. lime ratios. So it’s really tempting to just let the photos speak for themselves…

Tiles went on

Tiles went on OK.

Tiling the roof in summer heat was a tough job. Koray had the worst of it; he was placing the tiles while the rest of us only carried them up onto the roof. The results are great though.

Summer visitors enjoying the pool.

Summer visitors enjoying the pool.

Some old friends from Spain came to see us (from left to right, that’s Mar, Julia, Diego, and Manuel). It was great to see them and to take a few days off to socialize. But I fear we’re not the best hosts at the moment.  We are always thinking about the project!

As you’ll see further down, plaster is going on the walls now and so the visible-straw-bale stage is almost entirely behind us. I will miss it though: for a while the interior looked like a warm and inviting barn.

The straw bale stage

The straw bale stage comes to a close.

Mesh attached to the walls, gaps stuffed with fabric.

Plaster preparation: mesh attached to the walls, electrical cables installed, gaps in the straw stuffed with fabric.

Preparing for old-school lathe and plaster in the cafe.

Taking the old-school lathe-and-plaster approach in the cafe.

Plastering was a learning experience, like everything else. The air-powered plaster sprayer we imported from the US worked well at first, but tended to get blocked within about 30 minutes of use. You had to pull it apart to clean it, so it wasn’t a time-efficient approach. In the end we did the first coat of plaster the traditional way: by flicking it on with a trowel.

Early stage plastering: first coat is flicked on with a trowel.

Early stage lime plastering: first coat is flicked on with a trowel. (Note the privacy barrier separating the verandahs for rooms one and two.)

Interior plastering: working up to the desired thickness.

Interior plastering: working up to the desired thickness.

Roughly speaking, the plaster is about three parts sand to one part hydrated lime. Although Berrin has been doing most of the mixing, and she’s not following an exact recipe but instead judges the plaster consistency by eye. The ear is helpful too: you get used to the sound a good mix makes as it sloshes around the mixer.

The second coat is about filling up gaps and bringing the surface out to approximately where you want it. The final coat is made with finer sand and more lime, and gives a beautifully smooth finish. As the final coat dries, there’s much more of a sense of what the completed building will look like.

Smooth final coat of plaster on the south side.

Smooth final coat of plaster on the south side.

Berrin mixing five barrow loads of plaster for Koray.

Berrin mixing five barrow loads of lime plaster for Koray.

Late-stage interior plastering: one more coat to come.

Late-stage interior plastering.

We got some professional carpenters in to give us quotes on doing all the doors and windows. Unfortunately some of the quoted numbers were a bit eye-watering, so we’ve decided to do it ourselves. It will take longer, but we’ll save a lot of money and we know we’ll get the look we want. Right now the workload is split, with Koray and Berrin on plastering while Sirem, her sister Çisem, and I do windows and doors.

Time to build some windows and frames.

Time to build some windows and frames (glass comes later).

My office.

Back in the office.

Çisem after a day of sanding windows and doors.

Çisem after a day of sanding windows and doors.

Window frames going in, with bags of lime in the foreground.

Windows going in, with bags of lime in the foreground.

Another view of the windows; you can see what the finished product will look like now.

Another view of the windows; you can see what the finished product will look like now.

Lathe and plaster success!

Lathe and plaster success!

So that’s where we are now. There are still a lot of jobs left to do: floor tiles, bathrooms, kitchen fitting, etc. But the end is in sight. We hope to be finished and open for our first guests early in 2017. (At which point we can start on the second building, of course.)

Zeliş gazing wistfully into the distance.

Zeliş gazing wistfully into the distance.

Weather still good but turning colder: the autumn sunsets begin.

Weather still good but turning colder: autumn sunsets begin.


A roof and some walls

So, we had a coup. An attempted one, anyway. Thank you to the many friends and family members who checked in to see whether we were OK at the time. It was a scary and confusing 24 hours of news coverage. But for us that’s all it was: a day of watching TV and browsing the web, trying to figure out what was going on. At times like that it’s nice to live in a small town far from significant buildings and infrastructure.

It was a sad day for Turkey, with around 250 people killed. And in the aftermath a lot of young soldiers are potentially facing long jail sentences, while many people have lost their jobs for alleged links to the shadowy Gülenist movement. All of this comes on top of the ongoing troubles in the southeast of the country, a terrorist attack at Istanbul airport, and so on. Interesting times indeed.

Of course we hope that the situation will improve. But there’s not a great deal we can do about it on a personal level, and the truth is it hasn’t affected day-to-day life around here at all. So we have just been pushing on with construction work as usual.

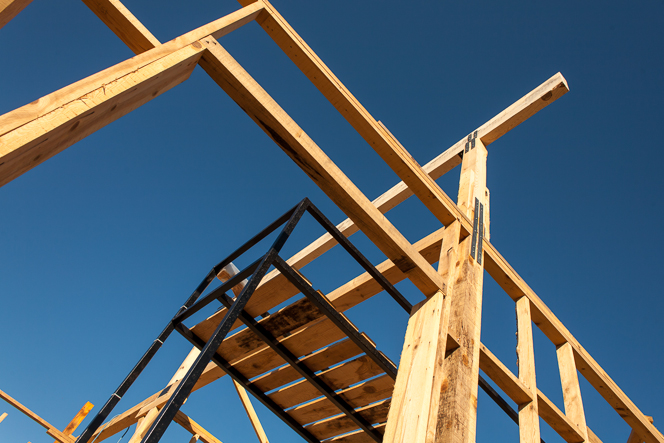
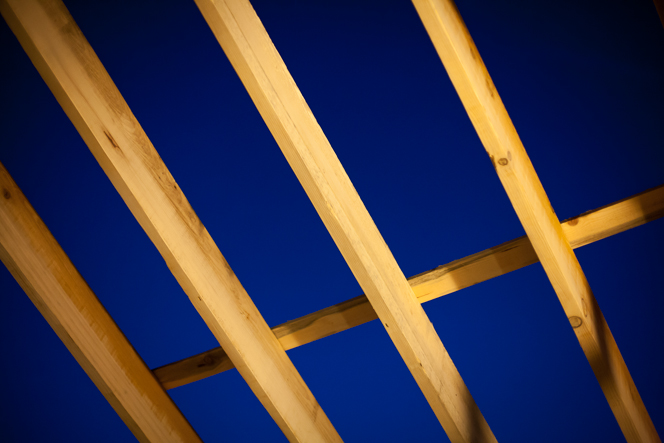
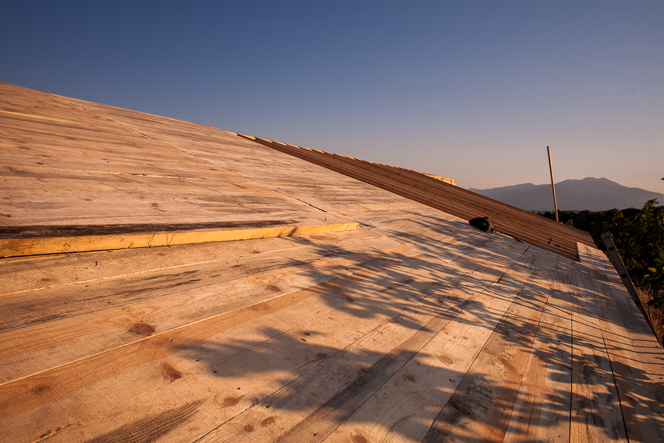
A big recent milestone for us was getting the roof completely covered with wooden planks. (The planks are there to support the waterproof membrane and the roof tiles, both still to come.)  As you can see in some of the photos below, the planks shrink a little after being nailed down, so there are some gaps that let light through. But it still feels much more like a building now that it has a covered roof.

Koray working on the roof.

Koray sawing planks on the roof.

Verandah coming together.

Verandah coming together.

Roof planks completed.

Roof planks completed.

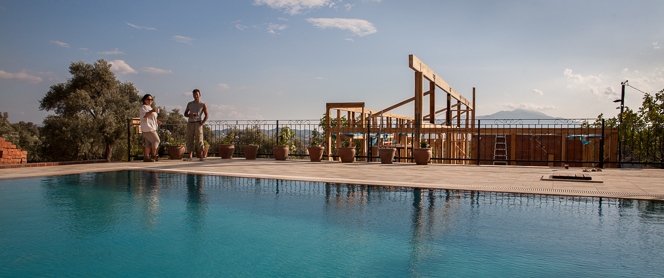
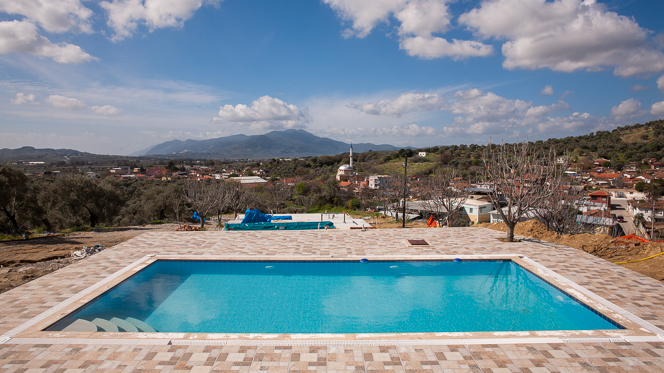
The pool has been a lifesaver, making working through the hot days of summer much more bearable. Which I guess is a good sign of its future popularity. One of our little pleasures is a drink by the pool in the evenings. The water is so warm that you don’t really want to get out.

Evening drinks by the pool.

Evening drinks by the pool.

The roof at night; lights of Germencik in the background.

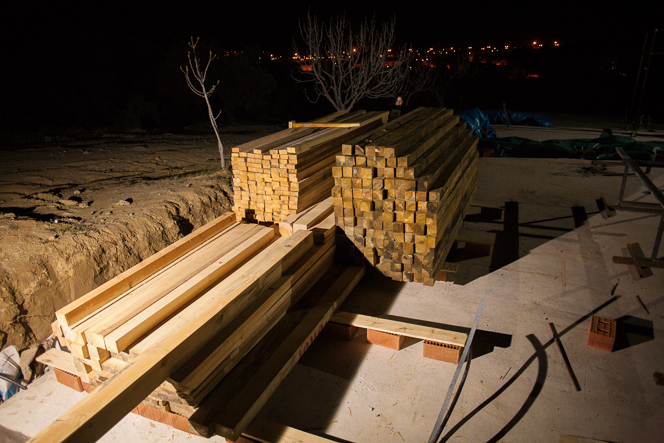
The new roof at night; lights of Germencik in the background.

And now a photo of me looking grumpy in the heat.  (Sirem insisted that I include it.) It looks like I should probably go for a swim and cheer up.

Portrait in 40 degree heat.

Portrait at 40 degrees C.

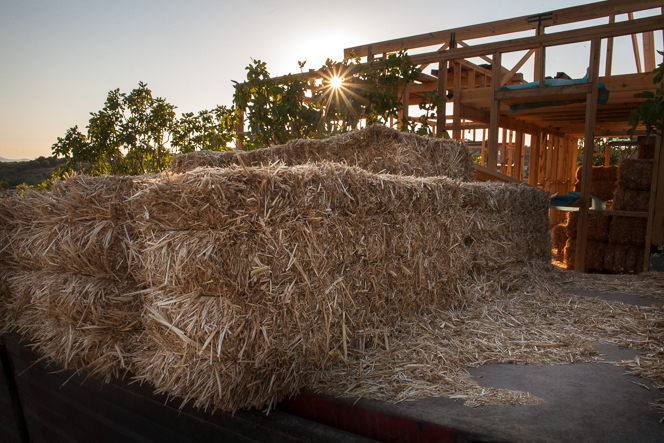
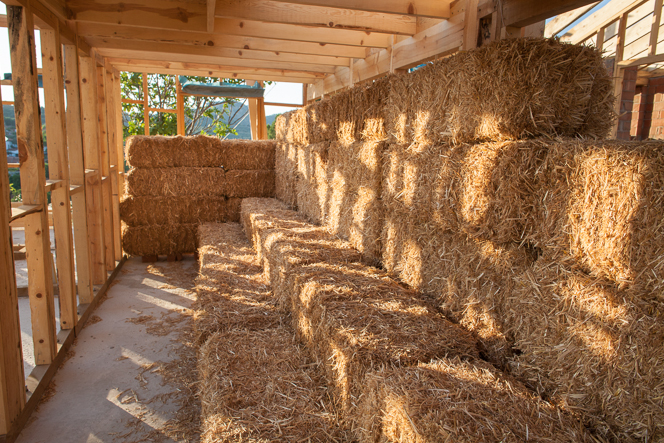
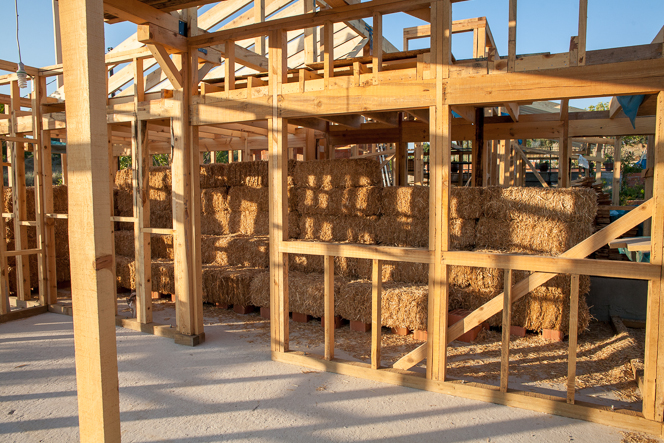
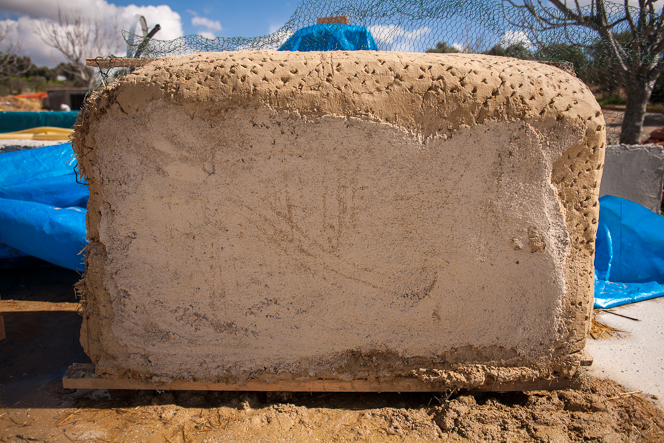
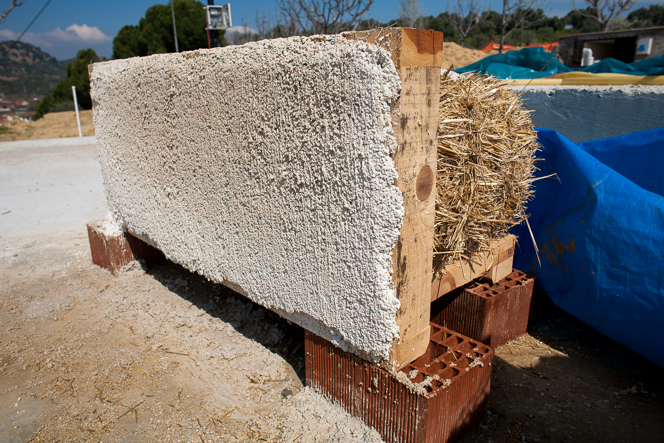
In parallel with the roof work, we’ve been building up the straw bale walls. It’s a mixed bag of a job: sometimes it’s easy and fast, like when you have a long run where you can use whole bales. But then you get to a fiddly bit in the corner or between two windows, and there’s a lot of splitting and re-tying the bales, which can get tedious. And especially when you have to lift bales up above your head for the higher sections, you end up wearing and breathing a lot of straw which is not the nicest feeling in the world. On the plus side, you do get to play with the chainsaw, which is essential for carving the bales so they fit neatly around the building’s wooden frame.

Straw bale interior.

Straw bale interior.

Essential equipment for shaping bales.

Essential equipment for shaping bales.

Roof from inside, with ceiling test panel.

Roof from inside. The white part is a test for one of our ceiling ideas: going to need something to hide all the insulation between the rafters.

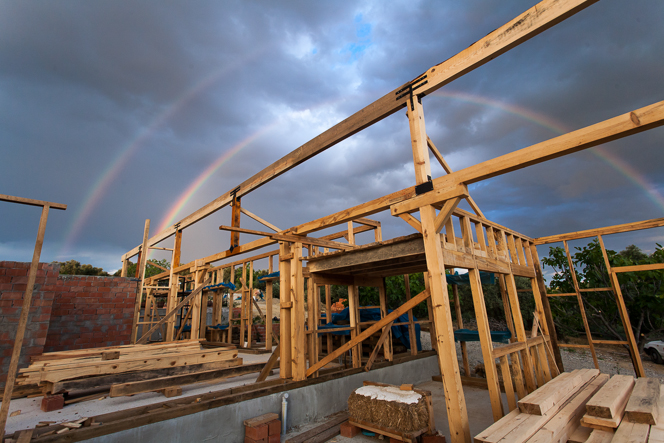
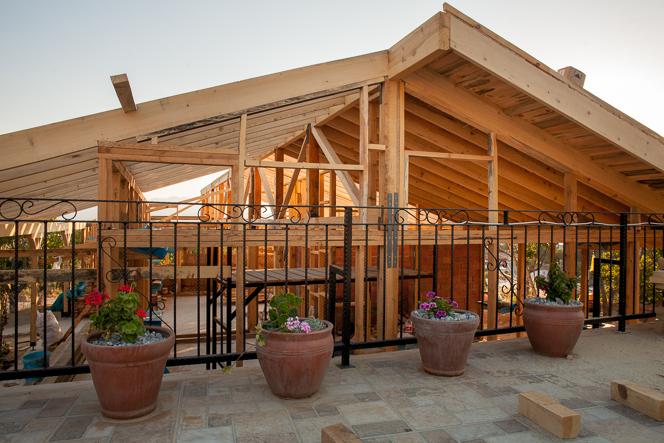
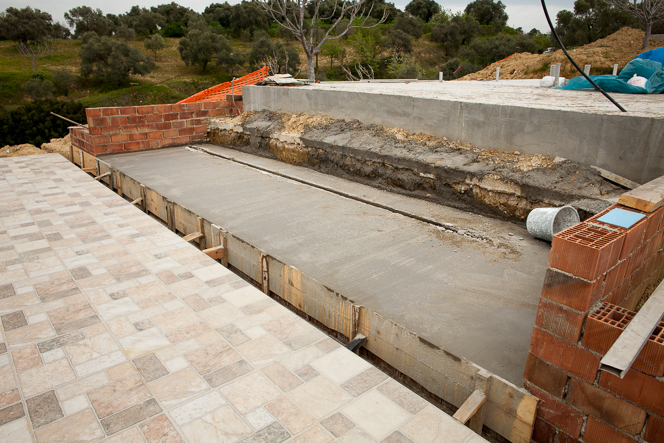
There was one final part of the structure that we’d been putting off for a while: an overhanging verandah for the cafe area at the west end of the building. It’s mostly done now. There were a few steps involved: concrete bases for big 15cm x 15cm columns, getting the support beam up on top of the columns, then getting the 5-metre rafters up. That’s where we are in the “after” photo below. And still to come are planks, guttering, waterproofing, and tiles, just like the rest of the roof.

Front of the cafe area.

Before photo: the front of the cafe area.

And now with added verandah rafters.

After photo: the verandah will add shade for plenty of outside tables.

It’s no surprise that summer has brought more visitors than winter did. Some weeks back we hosted Elisabeth and Max, some friends from Germany via Southampton. They got very involved in the construction work and we’re grateful for their help. Elisabeth and Max (and some co-conspirators; looking at you, Alex) also have a fine tradition of candid photography that truly captures the modern, relaxed German style. So who were we to refuse them?

German efficiency.

German efficiency.

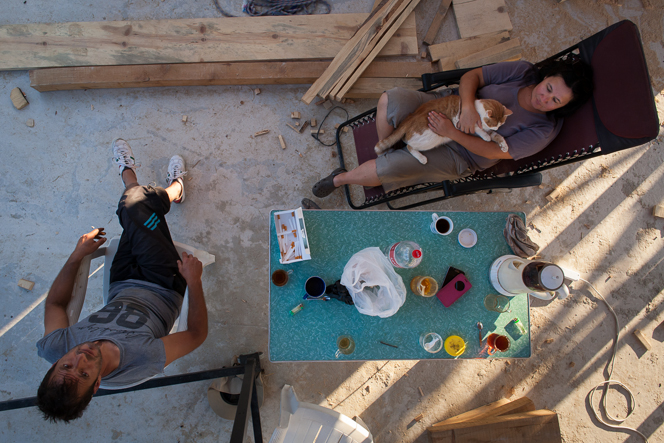
The next batch of visitors were my mum and dad, Diane and Barry. They were last here exactly a year ago, when nothing had happened yet up in the orchard. (And previously they were our very first visitors, a year before that.)  So, once more, it was great to see our recent progress through their eyes. Dad especially got involved in the building work, and mum played an important pool-testing role. We really appreciate their help.

Mum and Dad visiting.

Mum and Dad visiting, checking out their soon-to-be-favourite area of the cafe.

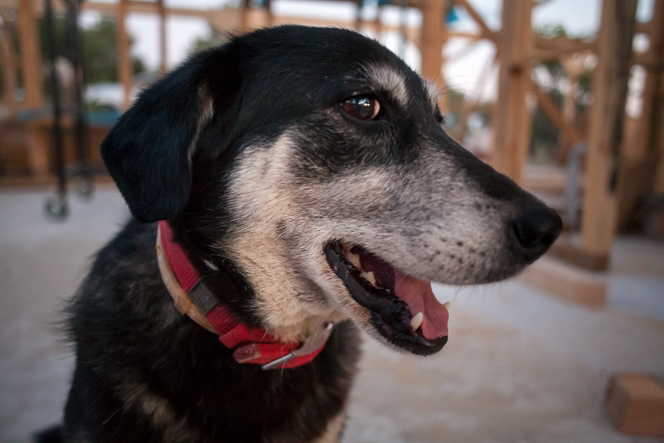
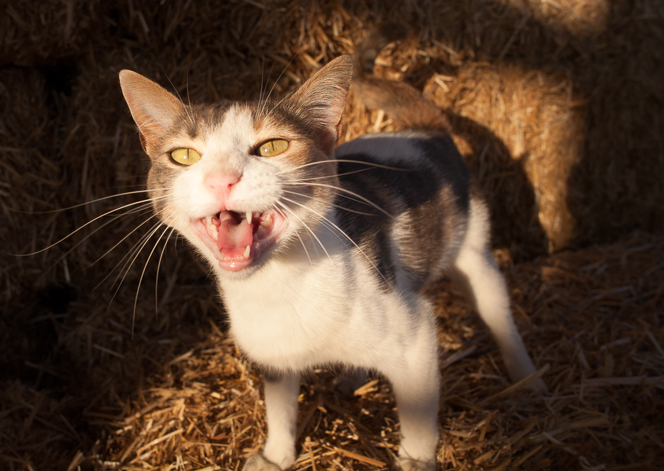
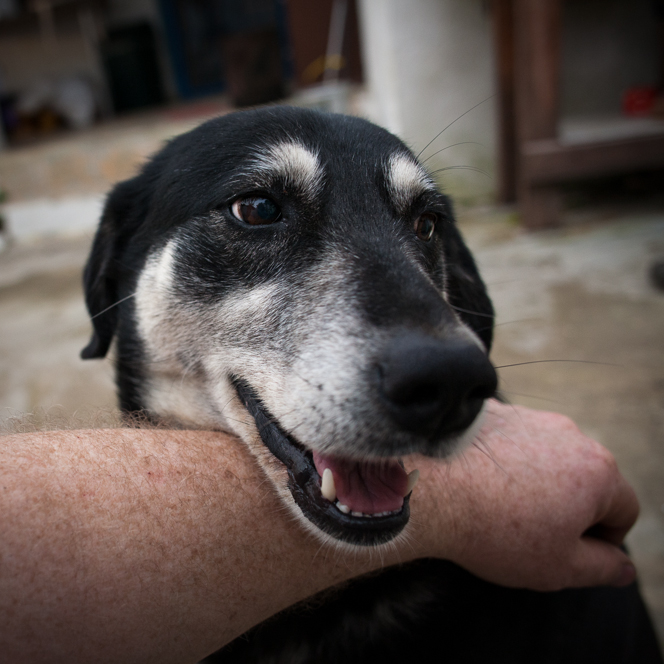
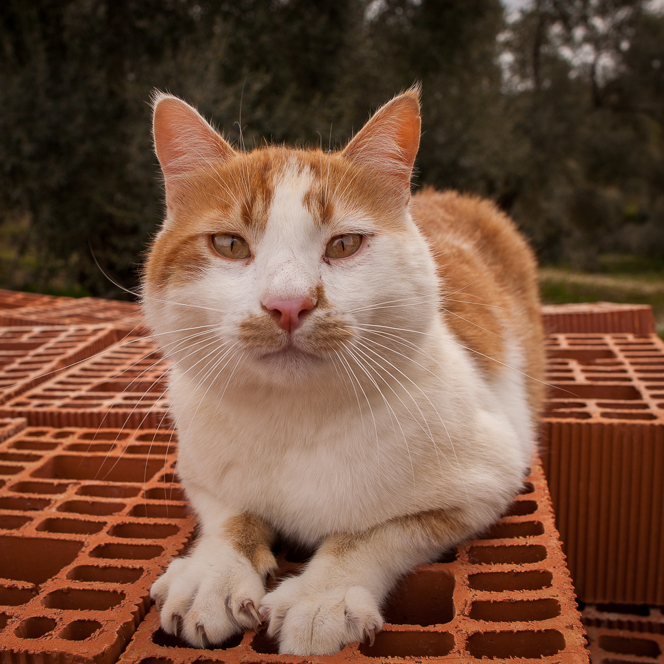
Animal lovers, you thought I had forgotten you, didn’t you? Not a chance. Apologies that it always seems to be the same animals in these photos: it happens because some of them have pre-emptively adopted the building site as their new home, while others live down in the old farmhouse and thus keep away from the cameras.

Cat.

Sookie being sweet, in between psychotic episodes.

Dog.

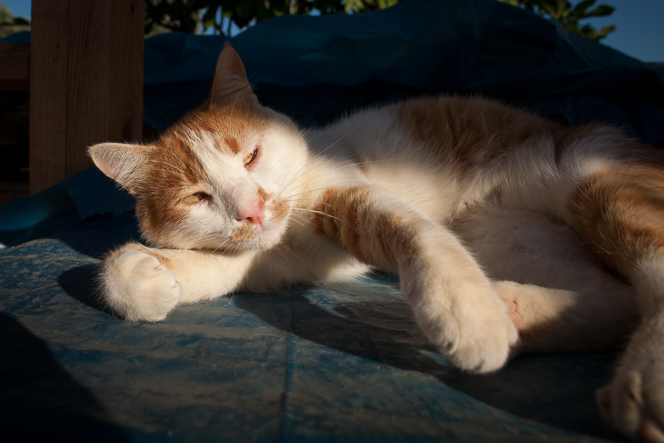
Tito feeling a bit tired and sorry for himself on a hot day.

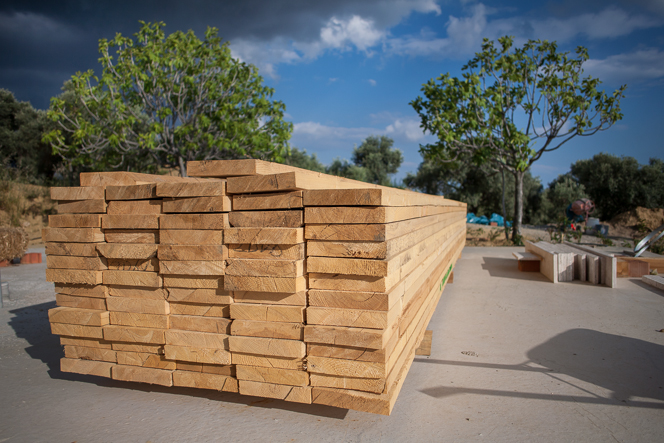
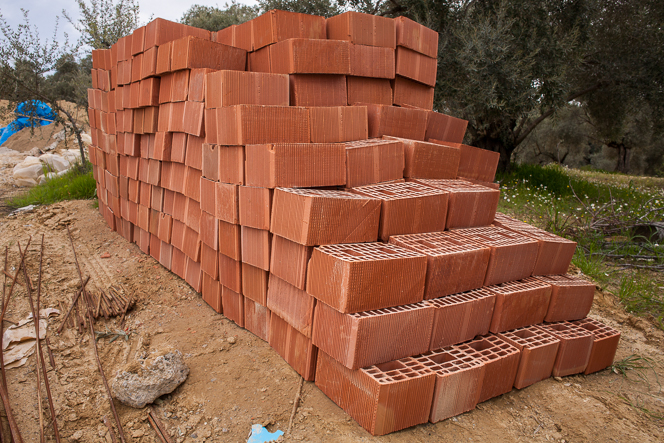
We were originally expecting our roof tiles several weeks ago, but there were delays from the supplier’s end. Apparently they needed to make a special batch just for us, because generally they don’t sell a lot of roof tiles in the middle of the summer. Apparently no-one but us is foolish enough to do roofing work in the heat. We are currently finding out just how sensible this accepted wisdom is: photos of the tiled roof to follow next time, I hope.

Roof tiles arrived at last.

Roof tiles arrived at last.

Roof with temporary plastic in case of rain (unlikely).

Roof ready for tiling. That’s a temporary plastic cover in case of rain.

Finally, we want to dedicate this post to our great friend Jesús Palomo Muñoz (1967-2016). He was a fantastic person who has left us all much too soon. We will miss him.

Roof started, bales arriving

There will be no food photos, look-at-this-sunset photos, or archaeology photos in this post. (Apologies if any of those are your thing.) Around here lately it’s all construction, all the time.

There will of course be some cat and dog photos. I am not a monster.

Main beam going up

One section of the main beam in place

Previously we showed you the central spine of the building: a series of beams, sitting up on columns, that help to hold up the roof. These beams and posts were only half the story though. Another series of even bigger beams has to go up on top of the first one in order to form the ridge of the roof.  The longest section is about 5.5 metres long, and getting all that wood up there was probably the toughest and scariest job we’ve done so far.

Rainbows on a cloudy day

Main beam complete, plus a rare summer storm with rainbows

In the second photo you can see how the ridge beam looked once it was secured in place. You can also see that we get the occasional dramatic summer storm.

And from another angle it’s clear how close the building is to the pool. We’re hoping that will turn out to be a good thing as the roof itself, with its wide eaves, will provide some much-needed shade on the pool terrace in the late afternoons.

Ready for rafters

Sirem and Koray taking a break by the pool; ridge beam in the background

With the ridge beam up we were ready to start work on the roof, which meant a final big timber delivery. Here’s a stack of six-metre planks ready to be used as rafters.

Rafters delivered

Rafters delivered

The rafters need diagonal cuts on each end to get them to the right length, plus a “bird’s mouth” cut to make sure they sit nicely on the top rail of the wall framing. We’ve also been sanding the bits that are going to remain visible once the insulation and the ceiling panels go in — it would be a shame to hide all that nice wood behind a plain white ceiling.

First rafters up

Evening shot of the first few rafters installed

Coming together

The roof structure starting to take shape

Cezmi approves

Of course Cezmi went up on the roof to inspect it

The roof isn’t finished yet, but it’s already made a big difference to the site.  Even a partial roof provides a lot of shade and the rising summer temperatures are easier to bear now we can get out of the sun.  The cats and dogs have noticed this too and are hanging around even more than usual.

Zeytin is always helpful

Zeytin is always helpful

Cezmi continues his supervisory role

Cezmi takes a break from his supervisory role

Tea break

Tea breaks are much more pleasant in the shade

It’s harvest time for wheat farmers in the area, so we’ve been buying straw bales while they’re cheap.  So far we’re paying 9 lira, or about £2.15 per bale, delivered. (Apparently if you leave it too late in the year, the price goes up quite a lot.)  The first batch was 80 bales that came up on the back of a tractor trailer, but we’re going to need about 500 in total for the building.  And another 500 later for buildings two and three, but that’s a future problem.

Straw bales arriving

Straw bales arriving

For now we’re storing the bales in what will one day be the cafe kitchen.  You can see some ceiling joists in the top of the shot, as the kitchen will have a little storage loft above it.

Straw bales stored in the kitchen

Straw bales stored in the kitchen

Here’s a view from inside the cafe area, looking over at the doorway to the kitchen. Those two interior window structures on the right will eventually become the bar (a very important feature).

The bar

Looking across at the bales via the kitchen door and the bar

Sookie, mother of kittens, has taken to disappearing on mysterious multi-day journeys now that the weather is warm. She decided that sleeping on straw bales was a good enough reason to come home though. It’s always a relief to see her back safely.

Sookie returns

Sookie returns

We decided on old-school wooden planks over OSB or plywood for the roof.  One reason is that real wood will hold up better if there is ever a leak. Another is that sections like the verandah roof and under the eaves (where there won’t be any insulation or ceiling panels) will look a lot nicer in real wood. And the cost worked out about the same as OSB anyway.

Roof planks going on

Roof planks going on

View from the pool

Another view from the pool area

After all the rafters and planks are up, the next steps are gutters, waterproof membrane, and ceramic tiles, in that order. Then we can get to the fun part of stacking those straw bale walls.

Framing and planting

Apparently some readers worry that there won’t be any animal photos in a new blog entry. So this time I thought I would end the suspense and get the animal photo out of the way early. (Only one this week, sorry.) Here is Cezmi — our construction site manager in cat form — sampling the water of the swimming pool.

Cezmi by the pool

Cezmi by the pool

So we’re working pretty hard at the moment, doing long days six days a week. Rain is our only interruption, and it’s getting to the time of year when rain is a rare event. A couple of Sundays ago we gave ourselves the day off and went for a drive in the mountains. Here are Sirem’s parents posing at the side of the road. This spot is about twenty minutes up into the hills behind our house.

Sirem's mum and dad, Nadire and Dogan

Sirem’s mum and dad, Nadire and Doğan. We wouldn’t be making so much progress if they weren’t doing a lot of the cooking and shopping for us — thanks!

We had lunch in the beautiful village of Birgi, right next door to the ski resort at Ödemiş, about 80km northeast. And did a tour of the local garden centres, but more on that later.

View of Birgi

View of Birgi

Traditional Turkish architecture in Birgi

Traditional architecture in Birgi

The building work is progressing well. We’re roughly on schedule, but can’t afford to relax as there’s still a lot to do if we want to be ready for our first guests by the end of summer.

The first phase of the work was getting the bathroom walls up. (They’re made of brick so we don’t have to worry about water from the showers ever penetrating the straw bale walls.) We’ve learned to lay bricks pretty well, I think, although we are nowhere near as fast as Koray.

Bathroom brickwork

Bathroom brickwork and improvised sunshade

The next step was taking the 10cm x 10cm lengths of treated timber and bolting them down to the concrete slab to act as a secure base plate for the timber framing. This went a lot easier than I thought it would. Luckily we have a beast of a drill that makes holes in the concrete without any fuss at all. We then used a two-part epoxy to glue 14mm threaded rod into the holes. Incredible stuff and it’s all rock-solid now.

Putting down the treated timber base plates

Putting down the treated timber base plates: you can start to see the floor plan

After that it was time for the timber framing to begin in earnest. Of course it’s not something we’ve done before, but after watching some videos on YouTube how hard can it be?  :)

ARE YOU NOT ACCOMMODATED?

ARE YOU NOT ACCOMMODATED?

The walls have gone up fast, although there are still details to take care of, like completing the internal stud walls and finishing all the window sill and lintel boxes. We’ve currently moved on to the spine of the building and put up some columns and beams that will help hold up the roof. Lots of this timber will be exposed in the finished build, so we took a bit more time with it and sanded each piece before it went up.

...

View of the exposed column-and-beam arrangement in room 1, looking through to the kitchen and cafe beyond. Please disregard the blocks of scrap timber temporarily holding it together.

...

The spine of the building, looking the other way towards the pool. Note that the ridge of the roof will be about 1.6 metres higher again.

...

Detail of a wooden column with T-bar support for the beams

...

Our favourite local mountain shot through the framing

There has also been some progress on the landscaping front. The gardens still look a bit dry and sparse but hopefully as everything matures they will become beautiful.

...

The fruits of a trip to the garden centre

...

Trying to make the most of the slope by building lots of small gardens on different levels

...

Kumquat and some kind of grass thing

...

Bougainvillea that will one day be encouraged to wrap itself around a verandah post

...

Lily in the sun

The pool railings are finished and installed: welding by Koray, painting by Sirem. We like how the ferforje (curly bits) turned out. Ornate, but not too fiddly.

...

New railings in place

...

Terracotta pots seem to suit the pool area

Most of our photos are taken from the south side of the building site, perhaps because that’s where the driveway puts you as you come up the hill. Here are a couple of shots from the north side that give a different perspective. The first one is a panorama showing the current condition of the pool area. The seating on the left is going to be great once we render the brickwork and build a pavilion roof: it’s possibly a bit too sunny at the moment.

Pano

Pool panorama

This one is taken from across the road on the opposite hill. You can see the whole project from here. From left to right: slab for our house, slab for rooms 3 and 4, the pool area (behind the poplar), timber frame under construction, and the driveway.

...

Project overview shot

And finally, I know I take too many photos of this mountain, but forgive me.  It’s hard to resist, and I don’t get out much.

...

Mount Mycale and Mount Thorax in changeable morning light


Deliveries

Let me warn you up front: this blog post, and probably future posts for a while, are going to be variations on the theme of “look at this thing we made!”

With that said… I am learning, too late in life, that a huge part of construction is just moving stuff around.  Here are three of our most recent deliveries, more or less neatly stacked.

Bricks

Bricks

Steel

Steel

Timber

Timber

That last one is not just a gratuitous night-time shot: the timber really did arrive late in the evening.  In fact it was delayed for a week or so longer than we were expecting.  The 10cm x 10cm pieces on the right are chemically treated to resist moisture, and those took a while to get hold of.

It wasn’t really a problem though.  We have so much to do if we’re going to hit our target of real guests by late summer, so we just worked on some landscaping instead of timber framing.  This next shot is yet another Sketchup model showing our plans for around the pool.  A steel railing to stop people falling off the terrace after one Tuborg too many, and on the other side a little pavilion surrounded by gardens and incorporating two built-in seating areas.  In summer we’ll hang some canvas or cotton at the front of the seating area to keep people in the shade during the hot afternoons.

Some of the planned landscaping around the pool.

Some of the planned landscaping around the pool.  The shadows are as they would be on the summer solstice at around 4pm.

Sharp-eyed readers will note that we haven’t really decided what’s happening at the back of the pool: probably a wooden fence with a lattice to grow climbing plants on.  It would be nice to have a rendered and limewashed brick wall but we’re thinking it’s a bit too close to the edge of the hillside for a heavy wall to be 100% safe.  Anyway, here’s the progress we’ve made in the last week on the seating area.

Poolside seating pavilion, under construction

Poolside seating pavilion, under construction

Koray, the guy you saw welding a door in the previous post, is now working with us full-time.  We really needed some more people power if we’re serious about opening the first two rooms this summer.   One of the first things he did for us was to install that door.

The door Koray was welding in the last post, now safely installed.

The machine room door, now safely installed.  (I did the twirly bits, honest.)

Koray has also done great work on building a stone retaining wall up the left side of the driveway, as well as a dozen other things.

Stone retaining wall on driveway nearly finished

Stone retaining wall on driveway nearly finished

Which reminds me, a big thank-you to my cousin Stephanie and her partner Mick.  They visited a couple of weeks back and helped carry a lot of the stones into position.  (We are officially becoming terrible hosts: “Had enough breakfast?  All done?  OK, great, now carry this 40 kilo rock.”)

At the foot of the stone wall there’s a concrete gutter.  Previously this ran into a large hole that connected to the storm-water drain.  Health and safety concerns suggest we shouldn’t leave a large hole lying around long-term, so I got to improve my bricklaying and rendering skills by building a drain cover.   We tried using powdered dyes to colour the rendering coat: two scoops of red, four scoops of yellow, and one scoop of black.  Not too bad a result if you like the Santa Fe adobe look.

Here's one I made earlier: drain cover

Here’s one I made earlier: drain cover.  Note modernist grille made by welding scrap rebar pieces together.

Here are a couple of photos of things we’re making with all those deliveries.  The bricks are for parts of the guest bathroom walls.  We’re still committed to straw bale, but we lost our nerve at the thought of the waterproofing needed to be sure that a straw bale in the wall behind a shower would never get wet.  So the external walls of the bathroom, and the wall between the two bathrooms, will be brick.  Still, they’re big 30 x 20 cm bricks with some air holes in them, there’ll be a double wall, and the 10cm gap between the inner and outer wall will be filled with polystyrene insulation.  It won’t quite be as good as straw, but should still be reasonably well insulated.

The first two guest bathrooms laid out with bricks

The first two guest bathrooms laid out with bricks.   Each bathroom is about 3 metres by 2 metres: big enough for everyone?

The steel is for pool terrace railings as shown in the Sketchup picture above.  They’re nearly done; they just need some twisty decorative bits (“ferforje” in Turkish) and a coat of black paint and they’re ready to go in.

Pool terrace railings under construction

Pool terrace railings under construction

And all this welding seems to be catching:  Sirem has now joined the party.  It looks like she’s been doing it for years, doesn’t it?

Sirem getting in on the welding action.

Sirem getting in on the welding action.  (Thanks to Stephanie for the photo.)

We’re still some distance away from the straw bale and plastering stage, but we’ve done some more testing recently to decide between clay plaster (which has the benefit of basically being free) and lime plaster, which stands up to moisture a lot better.  I think we’ve decided on the lime plaster solution, but it’s a shame to have to say no to the clay as the texture is really nice.

Plaster testing: three coats of mud plaster

Plaster testing: three coats of clay plaster on a straw bale (second coat still showing at the top there)

Plaster testing: two coats of lime plaster on a straw bale

Plaster testing: two coats of lime plaster on a straw bale

The pool has been properly filled and we are pleased to report that it didn’t fall over or spring a leak.  There was even a warm day in late February when I was stupid enough to try a first swim.  The pool was very nice but the water needs a bit more sun on it, I think.

What the pool looks like now

What the pool looks like now

And finally, a few shots of plants and animals to show that it is not quite all-construction, all-the-time.

Spring returns: almond blossoms in the neighbour's garden

Spring returns: almond blossoms in the neighbour’s garden

Zeliş relaxing

Zeliş relaxing

Zeytin is in a good mood, as usual.

Zeytin is in a good mood, as usual.

Cezmi, Sirem's sister's cat, maybe now our  cat, who believes he is the construction site manager

Cezmi, Sirem’s sister’s cat, maybe now our cat, who believes he is the construction site manager

Thanks for reading!

Cats, dogs, welding, and other delights

Greetings and salutations.

So, construction continues, but slowed down a bit by the winter rains.  And we’ve had some cold, grey days just recently, so here are a couple of photos from late last summer to warm things up.

Dilek national park, just opposite the Greek island of Samos.

Dilek national park, just opposite the Greek island of Samos.

Lifeguard's tower at the beach.

Lifeguard’s tower at the beach.

The foundations are done, and the pool is done except for being cleaned out and filled up.  It’s really the final few things now before timber framing starts in earnest (yes, I know I said that last time).  We’re just sorting out some drainage issues (e.g., where should all the rainwater go when there’s a big downpour?) and getting power and phone connections up to the slabs.

Sirem talks to the builder.  That blank wall is the edge of the pool's sun terrace, and the dark doorway on the left is how you get to the filter room.

Sirem talks to the builder. That blank wall supports a big terrace area next to the pool, and the dark doorway on the left is the way into the machine room where the pool filter and pump live.

Pool from above, showing the surrounding terrace.

Pool on a much greyer day, showing the surrounding terrace and the view.  Right now it’s an infinity pool, but we will partly spoil that by putting a building in the way.

The dogs check out the new tiles.

The dogs check out the new tiles.

Pool is done but needs a good clean.

Pool is done but needs a good clean.

Services all going into one big trench.

Services all going into one big trench.

Another in-progress job is sorting out a retaining wall for the bank of earth on the left side of the driveway.

Concrete laid on the side of the driveway, forming fa base for the stone retaining wall and a storm-water drain channel.

Concrete laid on the side of the driveway, forming both a base for a stone retaining wall and a storm-water drain channel.

34 tons of rocks to make a wall.

34 tons of rocks to make a wall.  We have to do it now, too, or we can’t get up the driveway.

What else?  We’ve had a re-think about the order in which to build everything: the new plan is to start at the bottom of the hill and work up.  So the first building will be the biggest one: the cafeteria and kitchen along with rooms one and two.  We figure this will make it possible to open for business before all three buildings are finished.  We can do the landscaping as we work our way up the hill, and use some kind of screen to hide the active construction from our first guests.   With luck, we could have people staying for real by late summer.

With that in mind, this is the view you would get if you walked out onto the verandah of room one.

View looking out over the neighbouring olive groves.

View looking out over the neighbouring olive groves.

Our little menagerie keeps us as busy as ever.

Front to back: Coco, Panini, and Pablo.

Front to back: Coco, Panini, and Pablo.

We had a big scare recently when Pablo, the black-and-white kitten, tried to poison himself by eating an especially dodgy mouse, but thankfully he pulled through.  Lost a bit of weight though.  This is him milking his illness for all it was worth.

Pablo convalescing.

Pablo convalescing.

And in our animals’ defence, they do try to be helpful when we’re working on the site.  Zeliş and Zeytin in particular are very sociable and like to park themselves in a comfortable patch of dirt and watch people work.

Zeliş notices something alarming.

Zeliş notices something alarming.


I’ve been pushing my welding skills a bit further.  The power to join two arbitrary bits of steel together has opened up lots of possibilities for future interior and exterior decor.  Here’s a simple little practice project I did last week…

Over-sized coat hook set (welded steel attached to wooden board).

Over-sized coat hook set (welded steel attached to wooden board).

I also started work on a metal security door for the pool’s machine room, but our plumber, Koray, took pity on my amateur skill level and offered to help out.  I say “offered to help out” but really it was more along the lines of “what are you doing?! you’re ruining it!  give me that!”  Great guy though, and helping him build the door has been very educational.

Koray in action.

Koray in action, welding a steel door and frame.

The barn has been cleaned up a bit and features a new home-made workbench.  The size and weight of the thing are probably overkill but I needed something heavy and solid to attach a vice to.

The barn looking as neat as it's ever likely to.

The barn looking as neat as it’s ever likely to.

Seeing as I am about to become a very busy carpenter, I also put together a handy little drill storage board, as suggested by a friend (thanks, John).  Getting a photo of it proved to be a bit trickier than expected though.

Panini, do you mind?  I was trying to take a picture of that thing behind you.

Panini, do you mind? I was trying to take a picture of that thing behind you.

Panini, please!

Panini, please!

You guys...

You guys…

Finally: drills.  It's not rocket science, but it's very convenient.

Finally: drill bit storage. It’s not rocket science, but it’s very convenient.

And last but not least, something we don’t do very often: a photo of the two of us.

I should really get a haircut...

I should really get a haircut…

Construction update

And now a quick set of long-overdue photos of the ongoing construction work.  I know I should have posted something weeks ago, but every time I was about to put some pictures up, I was tempted to wait for just one more development!

Our builders have done a great job.  They’re nearly finished, and soon it will be up to us to get some timber frames happening.

The concrete foundation slabs went down in four stages: first a rough layer of concrete directly onto the ground.  That makes a base for reinforced concrete beams that will go under the load-bearing walls .

Formwork for the concrete beams that will end up under the heavily loaded parts of the slab.

Formwork for the beams that will end up under the heavily loaded parts of the slab.

Lots of steel reinforcement going in.

Lots of steel reinforcement going in.

The slabs were big enough that it wasn’t possible just to dump concrete directly from the truck, so the pumping truck was called in as well for most of the pours.

Fortunately, concrete trucks get up our new driveway without too much trouble.

Luckily, concrete trucks can get up our new driveway without too much trouble.

Pump for pouring the concrete into the formwork.

Giant pumping truck for getting the concrete into the formwork.

The third stage was to dump heavy railway gravel into the gaps between the concrete support beams: this sets up a good base for the finished slab .  The gravel truck deliveries were dramatic, and the driver did well to get the truck into every corner where stone was needed.

About 30 tons of gravel arriving.

About 30 tons of railway-grade gravel arriving.

Gravel used as fill for under the slabs.

Gravel used as fill for under the slabs, and plumbing laid in.  Ready for the final pour.

Meanwhile our animal comrades have become very interested in the building process.

Zeytin approves of the work.

Zeytin approves of the work.

A range of different animals have been up to check things out.

Inspectors both large and small have been up to check things out during the night.

Sirem in particular has been really busy acting as site foreman, but we’ve also made time for a few other jobs.  Some neighbours invited us to harvest their pomegranate tree (long story).  It took longer than we thought — lots of standing up a ladder and getting scratched.  But the pomegranates are fantastic and make a disturbingly healthy-looking juice.

Pomegranates stored for winter.

Pomegranates stored for winter: if you hang them up with string so they’re not touching each other, they last much longer.

Ridiculously good for you.

Look at that vitamin C.  You could reach out and touch it.

We also put the finishing touches on our hügelkultur raised bed, which should make for lots of good vegetable options next spring.

Raised bed in the farmhouse garden is finally done.

Raised bed finally done.

And with colder nights coming in, I thought I had better build one more dog house for Tito (the dog who is not really our dog but just a stray who lives outside our gate and gets fed by us a lot).

Tito (who is not really our dog, he just lives on the street outside our place) get his own house.

Tito (who is not really our dog) gets his own house.  He is moving his head to make his face blurry which is part of his anti-paparazzi strategy.

The final part of the concrete work was pouring the 15cm-thick top slabs that will become the floor of each building.  The plumbing all seems to be in the right place so far.

Slabs all complete now.

Slabs all complete now (view from the top of the block).

And the swimming pool.  We know that in summer, life will centre around the pool for our guests, so we’re keen to do it right.  And the builders have been  fantastic.  (We’re happy to recommend them, if any Turkish readers are thinking about getting a pool built.)

Pool looking good.

Pool concrete looking good and being waterproofed.

Rounded steps in the south-east corner.

Rounded steps under construction in the south-east corner.

Tiles going in, and part of the deck area taking shape.

Tiles going in, and part of the pool terrace area taking shape.

Finally a couple of sunset photos so you can see what the winter light is looking like now.

Sunset with boots.

Sunset with work boots.

Winter sunset view from what will one day be the cafe terrace.

Winter sunset view (from what will one day be the cafe terrace).


« Older posts Newer posts »

© 2024 Ionia Guest House

Theme by Anders NorénUp ↑